Installation Guide
Preparation
Safety Precautions
Ensure cellular network coverage is available, and confirm the availability of a 100-240V AC or 9~36V DC power supply at the installation site.

Important: Install the device while it is powered off to prevent any damage or data loss.
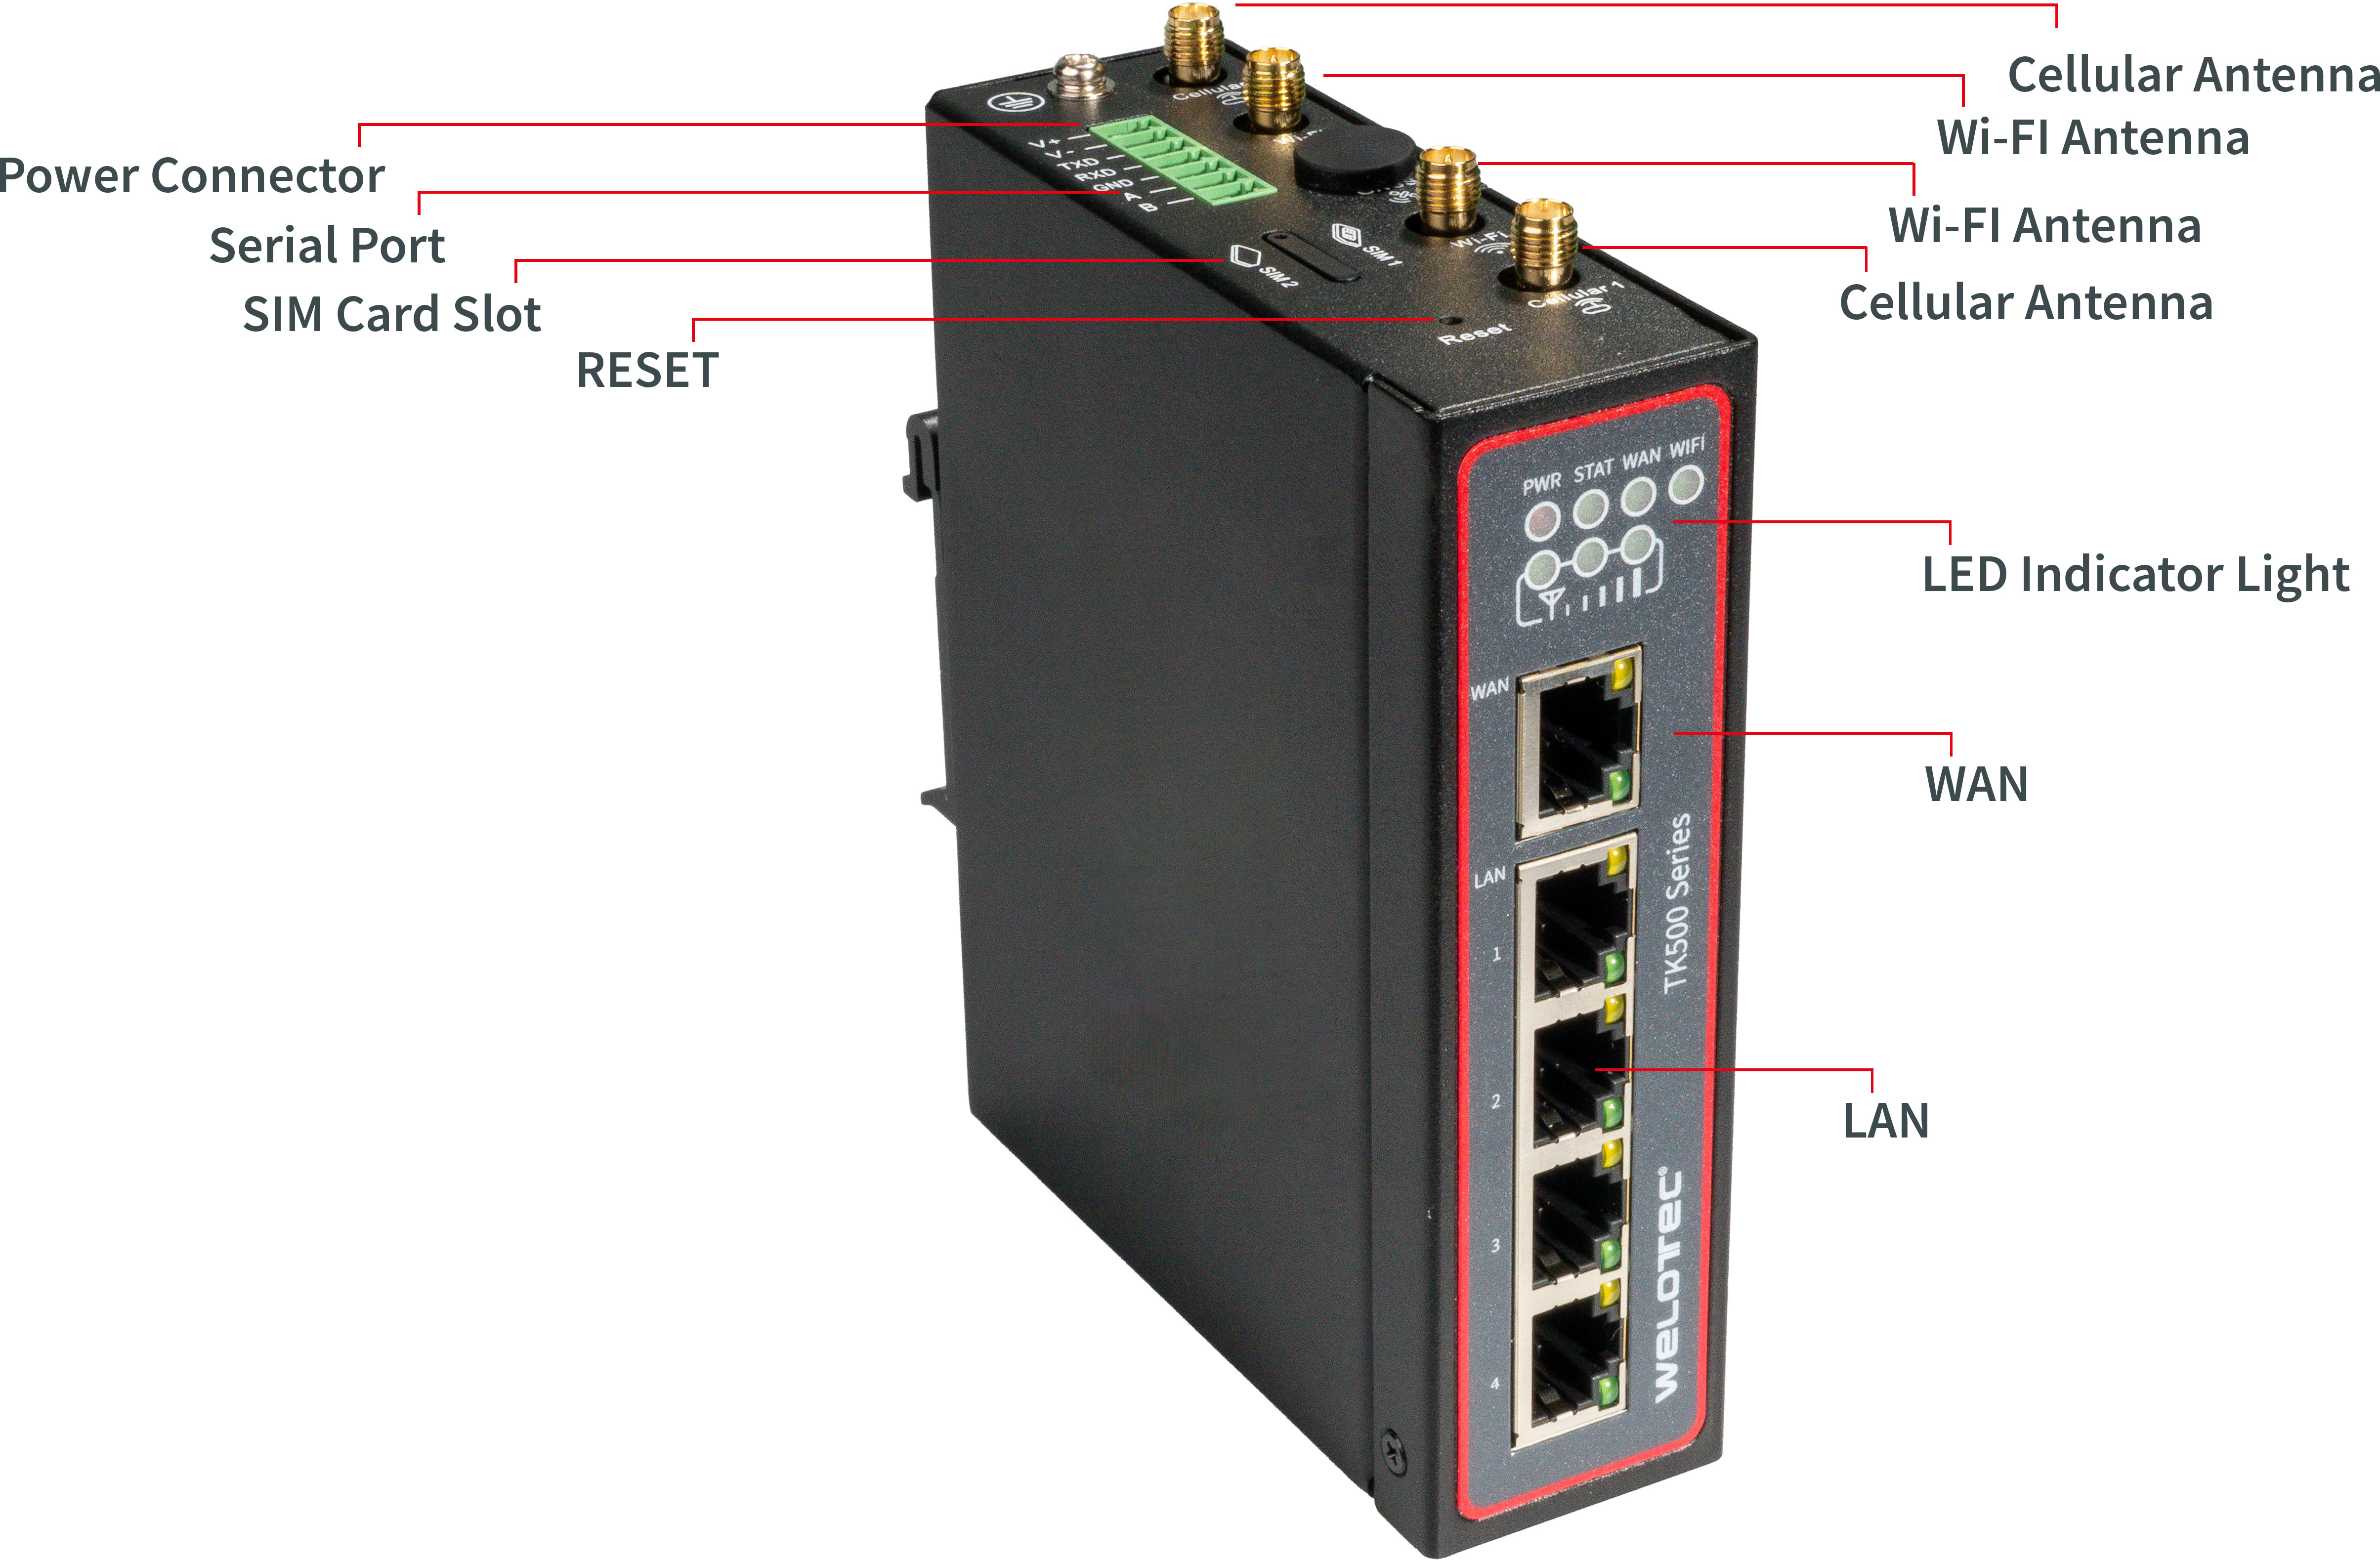
Panel Overview

LED Indicator Guide
LED Indicator |
Description |
|---|---|
PWR |
Off indicates power off; steady red signals power on. |
STAT |
Off signals a system error; flashing green indicates a system upgrade; steady green shows the system is operational. |
WIFI |
Off means Wi-Fi is disabled; flashing green indicates connection in progress; steady green shows Wi-Fi is active. |
WAN |
Off signals no network connection; flashing green denotes connecting; steady green indicates connectivity. |
Signal |
Multiple lights: Three green denotes strong signal and successful dial-up; two green for moderate; one green for weak signal. |
Resetting to Factory Defaults
Power on the device and immediately press and hold the reset button for 20 seconds until the STAT LED is continuously lit.
Release the reset button; the STAT LED will turn off.
Press and hold the reset button again until the STAT LED flashes, then release. The device will reboot with factory settings.
Configuration Setup
Connection Setup
Connect your computer to a LAN port on the router. You can configure the Ethernet interface of your computer as follows:
I. Automatic IP Configuration (Recommended)
Set your computer to automatically obtain an IP address and DNS server address. This allows the device to assign an IP address to your computer automatically.
II. Static IP Configuration
Manually set your computer’s IP address to match the network segment of the router’s LAN interface (e.g., set your computer’s IP to 192.168.2.2 and the router’s to 192.168.2.1 (factory default) with a subnet mask of 255.255.255.0).
III. Disable Proxy Settings
If your computer uses a proxy server for internet access:
In your browser, navigate to “Tools > Internet Options.”
Go to the “Connections” tab and click “LAN Settings.”
Ensure “Use a Proxy Server for your LAN” is unchecked and click “OK.”
Web Interface Access
Open a web browser and enter the router’s IP address:
http://192.168.2.1.Log in using the default credentials (username: adm, password: [printed on the device label]) to configure the router.

Security Tip: It is highly recommended to change the default password during your first login to secure your network.